The Post Where I Figured Out Integrating a RESTful API

"Let's call it an accidental feature."
- Larry Wall
As I have continued my learning experience in this web development adventure, one area that I have tried to focus on is how to integrate API's into the web applications that I build. With the abundance of information available in different API's out there, it's an important skill to know if I want to have access to a lot of information.
Trying to get an API integrated into Rails, and have that information passed to a React front-end was an interesting feat, so I thought I would share my process.
For the purposes of this demo, I found an awesome API that contains a large database of Cocktail recipes called The Cocktail DB.
Step One: Get the API Data Into My Rails Back-End
Since I wanted my API to go through a back-end (mainly because I wanted to build in OAuth into the app, and have a database in place for users to store their favorite recipes), I had to figure out how to get the API call to route through Rails.
This ended up requiring two steps. One was building the object to make the API call, and the other was building a method in the Rails controller for the front end to call.
The API call step ended up being pretty easy thanks to a Ruby Gem called REST Client. All I had to do was build a ruby class that could be called upon by the controller:
require 'rest-client'

class Cocktail

def get_random_cocktail

  RestClient.get('http://www.thecocktaildb.com/api/json/v1/1/random.php', {accept: :json})

end

end
With the API call set up and ready to go, I then set up a cocktail controller that would initiate the API call when the get_random_cocktail method was run:
class Api::CocktailsController < ApplicationController

  def index

  random = Cocktail.new
  @cocktail = random.get_random_cocktail()
  render json: @cocktail

  end

end
Step Two: Allow Cross-Origin HTTP Requests
With the back-end set up, I am now in a position to set up the front-end to read the data of the API calls.
However, there is one important step to take into account to make sure the back-end and front-end are allowed to speak to each other, and that is to enable Cross-Origin Resource Sharing (CORS)
In layman's terms, our Rails back-end runs its server on Localhost:3001, while the React front-end runs its server on Localhost:3000. If we want the two servers to be able to transmit data to each other, we have to explicitly allow this.
This is also a fairly easy step. When a new rails application is created, it already has all the necessary code built in, its just a matter of un-commenting the code,
In our Gemfile, we would activate the "rack-cors" gem:
# Use Rack CORS for handling Cross-Origin Resource Sharing (CORS), making cross-origin AJAX possible

gem 'rack-cors'
And then, we would need to un-comment the middle-ware initialization in the cors.rb file under config/initializers:
Rails.application.config.middleware.insert_before 0, Rack::Cors do
  allow do
    origins 'localhost:3000'

    resource '*',
      headers: :any,
      methods: [:get, :post, :put, :patch, :delete, :options, :head]
  end
end
Step Three: Initiate a React Front-End API Call, and Put the Data Into State
Now that the back-end is all set up and ready to go, lets set up our front-end to make an API call to our back-end. I have set this up to occur via the Axios NPM package, and utilizing React Hooks:
import React, {useState, useEffect} from 'react';
import axios from 'axios';
import {Card, Image, Icon} from 'semantic-ui-react';
import Navbar from './Components/Shared/Navbar';

function RandomCocktail() {
  const [drinkInfo, setDrinkInfo] = useState( '' )
  useEffect(() => {
    async function fetchData() {
    const result = await axios.get('/api/cocktails');
    setDrinkInfo(result.data.drinks[0])}
    fetchData();
  }, [])

}
Add in some styles and basic formatting:
const style = {
center: {
display: 'block',
marginRight: 'auto',
marginLeft: 'auto',
},
background: {
backgroundImage: "url('')",
height: '100%',
width: '100%',
},
list: {
listStyleType: 'none',
display: 'inline-block',
},
container: {
paddingRight: '33%',
paddingLeft: '33%',
},
}
const ingredientList = () => {
const ingredients = Object.entries(drinkInfo)
const result = []
ingredients.map((x, i) => {
if ((ingredients[i][0].includes('Ingredient') === true)
&& (ingredients[i][1] !== "") && (ingredients[i][1] !== null)) {
result.push({ ingredient: ingredients[i][1] })
}
})
return result
}
const measureList = () => {
const measures = Object.entries(drinkInfo)
const result = []
measures.map((x, i) => {
if ((measures[i][0].includes('Measure') === true)
&& (measures[i][1] !== "") && (measures[i][1] !== null)) {
result.push({ measure: measures[i][1] })
}
})
return result
}
return (
<>
<div style={style.background}>
<h1 style={{textAlign: 'center', color: 'white'}}>Cocktail of the Day</h1>
<br></br>
<div style={style.container}>
<Card style={style.center} fluid>
<Image src={drinkInfo.strDrinkThumb} centered size={"huge"} />
<Card.Content>
<Card.Header>{drinkInfo.strDrink}</Card.Header>
<Card.Meta>
<ul style={style.list}>
{measureList().map((x) => {
return <li key={x+1}>{x.measure}</li>
})}
</ul>
<ul style={style.list}>
{ingredientList().map((x) => {
return <li key={x+1}>{x.ingredient}</li>
})}
</ul>
</Card.Meta>
</Card.Content>
<Card.Content extra>
<Card.Header>Instructions</Card.Header>
<Card.Description>{drinkInfo.strInstructions}</Card.Description>
</Card.Content>
</Card>
</div>
<br></br>
<br></br>
</div>
</>
);
}
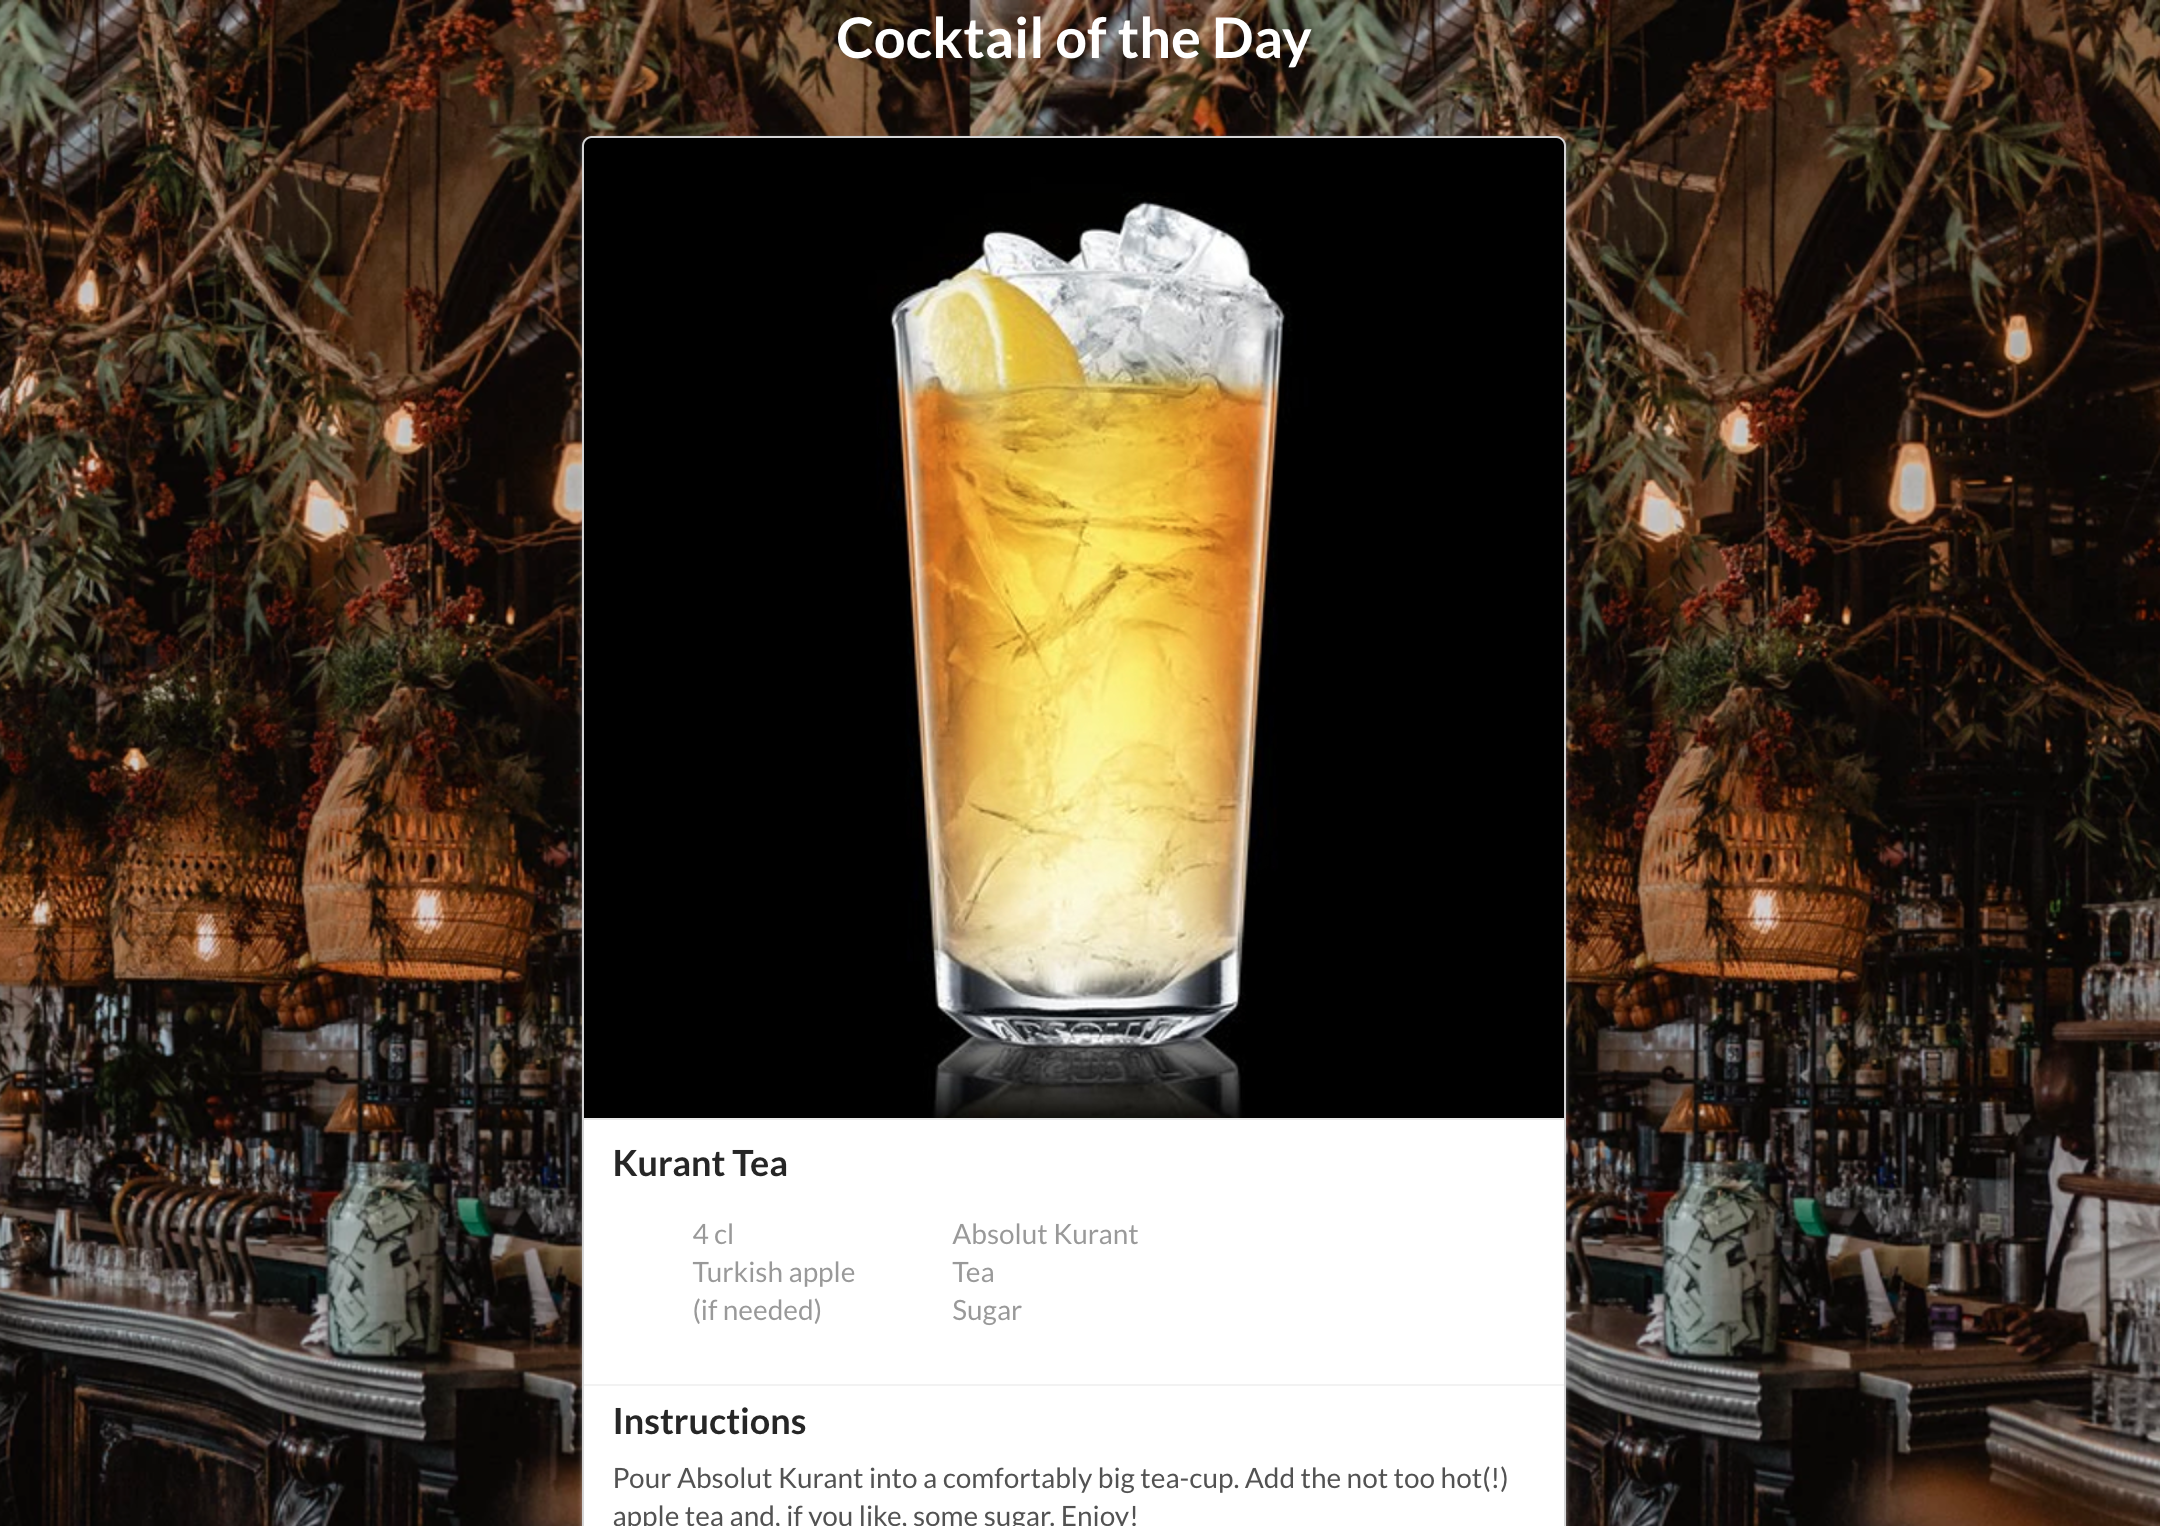
export default RandomCocktail;And Boom! We now have a basic website populating the information from the API:
There is a lot more to this site that needs to be worked on before I post the live demo. In the meantime, you can check out my GitHub repo to see the full project